JavaScript npm & package.json in 2026: The Complete Guide
Every modern JavaScript project starts with npm init. The Node Package Manager (npm) is the backbone of the JavaScript ecosystem, hosting over 2.5 million packages and processing billions of downloads every week. Whether you’re building a React app, an Express server, or a CLI tool, understanding npm and package.json is non-negotiable in 2026.
This guide covers everything from basic npm commands to advanced dependency management, scripts, workspaces, and security practices. By the end, you’ll understand how professional teams manage JavaScript dependencies at scale.
What Is npm and Why Does Every JavaScript Developer Need It?
npm stands for Node Package Manager. It’s three things in one: a command-line tool for installing packages, an online registry (npmjs.com) hosting millions of packages, and a way to manage project dependencies through package.json. When you install Node.js, npm comes bundled with it — no separate installation needed.
Before npm existed, developers copied JavaScript files manually, pasted code from forums, or used <script> tags pointing to CDNs. npm solved the dependency problem by providing a standardized way to declare, install, and update packages. Today, virtually every JavaScript project — from ES Modules to full-stack frameworks — relies on npm.
# Check your npm version
npm --version

# Check Node.js version
node --version

# Update npm to latest
npm install -g npm@latest
npm init: Creating Your First package.json
The package.json file is the heart of every Node.js project. It declares your project’s name, version, dependencies, scripts, and metadata. Creating one is the first step in any new project.
# Interactive setup (asks questions)
npm init

# Quick setup with defaults
npm init -y

# Using a specific scope
npm init --scope=@myorg
Here’s what a typical package.json looks like after initialization:
{
  "name": "my-project",
  "version": "1.0.0",
  "description": "A sample JavaScript project",
  "main": "index.js",
  "scripts": {
    "test": "echo \"Error: no test specified\" && exit 1"
  },
  "keywords": ["javascript", "tutorial"],
  "author": "Your Name",
  "license": "MIT"
}
The -y flag accepts all defaults, which is perfect for quick prototypes. For production projects, take the time to fill in proper descriptions and keywords — they matter if you ever publish to the npm registry.
Installing Packages: npm install Deep Dive
The npm install command (or its shorthand npm i) is the command you’ll use most often. It downloads packages from the npm registry and adds them to your project.
# Install a production dependency
npm install express

# Install multiple packages at once
npm install express cors helmet

# Install a specific version
npm install lodash@4.17.21

# Install a dev dependency (not needed in production)
npm install --save-dev jest eslint prettier

# Install globally (available system-wide)
npm install -g nodemon typescript

# Install from a GitHub repo
npm install github:user/repo
dependencies vs devDependencies
This distinction matters in production. Dependencies (dependencies) are packages your application needs to run — Express, React, database drivers. Dev dependencies (devDependencies) are tools you need during development — test runners, linters, build tools. When you deploy to production with npm install --production, dev dependencies are skipped.
{
  "dependencies": {
    "express": "^4.18.2",
    "mongoose": "^7.6.0"
  },
  "devDependencies": {
    "jest": "^29.7.0",
    "eslint": "^8.50.0",
    "nodemon": "^3.0.1"
  }
}
A common mistake is installing build tools like webpack or TypeScript as regular dependencies. They should almost always be dev dependencies since your production server doesn’t need them — only the build output matters.
Semantic Versioning: What ^4.18.2 Actually Means
npm uses semantic versioning (semver) to manage package versions. Every version number follows the pattern MAJOR.MINOR.PATCH:
- MAJOR (4.x.x): Breaking changes that require code modifications
- MINOR (x.18.x): New features, backward compatible
- PATCH (x.x.2): Bug fixes, backward compatible
The symbols before version numbers control which updates npm can install:
{
  "dependencies": {
    "express": "^4.18.2",   // Caret: allows minor + patch updates (4.18.2 to 4.99.99)
    "lodash": "~4.17.21",   // Tilde: allows only patch updates (4.17.21 to 4.17.99)
    "react": "18.2.0",      // Exact: only this specific version
    "next": ">=14.0.0",     // Range: any version 14.0.0 or higher
    "vue": "*"              // Wildcard: any version (dangerous!)
  }
}
The caret (^) is npm’s default and the most common. It’s a reasonable balance between getting updates and avoiding breaking changes. For critical production applications, some teams use exact versions or lockfiles to ensure reproducible builds.
The Lockfile: package-lock.json Explained
When you run npm install, npm creates package-lock.json. This file records the exact version of every package (and every sub-dependency) that was installed. While package.json says “I want Express ^4.18.2,” the lockfile says “I installed Express 4.18.2, which depends on body-parser 1.20.1, which depends on…” — all the way down.
# Install using exact versions from lockfile (CI/CD recommended)
npm ci

# Regular install (may update within semver ranges)
npm install
The key rule: always commit package-lock.json to version control. This ensures every developer and every CI server installs identical dependencies. The npm ci command is designed for CI/CD pipelines — it’s faster than npm install and fails if the lockfile is out of sync with package.json.
npm Scripts: Automating Your Workflow
The scripts field in package.json lets you define custom commands that run with npm run <script-name>. This is how modern JavaScript projects handle building, testing, linting, and deployment.
{
  "scripts": {
    "start": "node server.js",
    "dev": "nodemon server.js",
    "build": "vite build",
    "test": "jest --coverage",
    "test:watch": "jest --watch",
    "lint": "eslint src/",
    "lint:fix": "eslint src/ --fix",
    "format": "prettier --write src/",
    "pretest": "npm run lint",
    "postbuild": "echo Build complete!"
  }
}
# Run named scripts
npm run dev
npm run build
npm run lint:fix
# Special scripts that don't need "run"
npm start # same as npm run start
npm test # same as npm run test
# Run scripts sequentially
npm run lint && npm run test
# Pass arguments to scripts
npm run test -- --verboseNotice the pretest and postbuild scripts. npm supports lifecycle hooks — any script prefixed with pre or post runs automatically before or after the matching script. So npm test automatically runs linting first via pretest.
npx: Run Packages Without Installing
npx comes bundled with npm (version 5.2+) and lets you execute packages without installing them globally. This is incredibly useful for one-off commands and project scaffolding.
# Create a new React app (without installing create-react-app globally)
npx create-react-app my-app

# Create a Vite project
npx create-vite@latest my-project

# Run a locally installed binary
npx jest --coverage

# Run a specific version of a package
npx node@18 script.js

# Try a package without installing
npx cowsay "Hello npm!"
npx first checks if the package exists in your local node_modules/.bin, then checks your global installations, and finally downloads it temporarily from the registry. This keeps your global installations clean and ensures you always use the latest version of scaffolding tools.
Managing Dependencies: Update, Remove, and Audit
# See which packages have updates available
npm outdated

# Update all packages within semver ranges
npm update

# Update a specific package
npm update lodash

# Remove a package
npm uninstall express
npm rm express        # shorthand

# Check for security vulnerabilities
npm audit

# Auto-fix vulnerabilities where possible
npm audit fix

# Force fix (may introduce breaking changes)
npm audit fix --force

# List all installed packages
npm list
npm list --depth=0    # top-level only
Security auditing is critical. The npm audit command checks your dependency tree against a database of known vulnerabilities. Run it regularly and especially before deployments. Many CI/CD pipelines include npm audit as a required step.
npm Workspaces: Monorepo Management
npm workspaces (npm 7+) let you manage multiple packages in a single repository — a monorepo. This is common in large projects where you have a shared library, a frontend app, and a backend API all in one repo.
{
  "name": "my-monorepo",
  "workspaces": [
    "packages/*"
  ]
}
# Project structure
my-monorepo/
├── package.json
├── packages/
│ ├── shared/
│ │ └── package.json
│ ├── frontend/
│ │ └── package.json
│ └── backend/
│ └── package.json
# Install all workspace dependencies
npm install
# Run a script in a specific workspace
npm run build --workspace=packages/frontend
# Run a script in all workspaces
npm run test --workspaces
# Add a dependency to a specific workspace
npm install react --workspace=packages/frontendWorkspaces hoist shared dependencies to the root node_modules, reducing disk space and ensuring version consistency across packages. This pattern is used by major open-source projects and companies managing complex JavaScript codebases.
The .npmrc File: Configuring npm Behavior
The .npmrc file lets you customize npm’s behavior per-project or globally. Common uses include setting a private registry, configuring authentication tokens, and changing default settings.
# .npmrc (project level)
registry=https://registry.npmjs.org/
save-exact=true
engine-strict=true

# Use a private registry for scoped packages
@mycompany:registry=https://npm.mycompany.com/

# Set default init values
init-author-name=Your Name
init-license=MIT
The save-exact=true setting makes npm save exact versions instead of using the caret prefix. Some teams prefer this for maximum reproducibility.
npm vs Yarn vs pnpm: Which Package Manager in 2026?
While npm is the default, two alternatives have significant adoption:
Yarn was created by Facebook in 2016 to address npm’s speed and reliability issues. Yarn 4 (Berry) introduced Plug’n’Play, eliminating node_modules entirely. It’s fast and used by many large companies.
pnpm uses a content-addressable store and hard links, meaning packages are stored once on disk and shared across projects. It’s the fastest package manager and uses the least disk space.
# Yarn equivalents
yarn add express          # npm install express
yarn add -D jest          # npm install --save-dev jest
yarn                      # npm install
yarn build                # npm run build

# pnpm equivalents
pnpm add express          # npm install express
pnpm add -D jest          # npm install --save-dev jest
pnpm install              # npm install
pnpm run build            # npm run build
In 2026, all three are production-ready. npm has caught up significantly in speed and features. Choose based on your team’s preferences — the concepts (dependencies, lockfiles, scripts) are identical across all three.
Common npm Mistakes and How to Avoid Them
After years of working with npm, these are the mistakes that catch developers most often:
Not committing the lockfile. Without package-lock.json in version control, different developers get different dependency versions. This leads to “works on my machine” bugs that are incredibly hard to debug.
Installing everything globally. Global installs create version conflicts between projects. Use npx for CLI tools or install them as dev dependencies. The only packages that truly need global installation are tools you use across all projects, like npm itself.
Ignoring security audits. A single vulnerable dependency can compromise your entire application. Run npm audit regularly and integrate it into your CI pipeline. Consider using tools like Snyk for continuous monitoring.
Not using npm scripts. Teams that type raw commands instead of using scripts create inconsistency. If building requires tsc && vite build && node postbuild.js, put that in a script. New developers should only need npm run build.
Publishing Your Own npm Package
If you’ve built something useful, publishing to npm is straightforward:
# Create an npm account (one time)
npm adduser

# Login
npm login

# Ensure package.json is correct
# name, version, main/exports, files, description

# Publish
npm publish

# Publish a scoped package publicly
npm publish --access public

# Update version and publish
npm version patch    # 1.0.0 -> 1.0.1
npm version minor    # 1.0.0 -> 1.1.0
npm version major    # 1.0.0 -> 2.0.0
npm publish
Before publishing, add a files field to control what gets included in the package, and set main (for CommonJS) and exports (for ES Modules) to point to your entry files.
Practical npm Workflow for Real Projects
Here’s the npm workflow used by professional JavaScript teams in 2026:
# 1. Clone the project
git clone https://github.com/team/project.git
cd project

# 2. Install dependencies (use ci in CI/CD)
npm ci          # CI/CD
npm install     # Local development

# 3. Start development
npm run dev

# 4. Before committing
npm run lint
npm run test
npm audit

# 5. Build for production
npm run build

# 6. Deploy
npm run deploy
This workflow ensures code quality, security, and consistency across the team. Combined with Git hooks (using Husky), you can automate linting and testing before every commit.
What’s Next
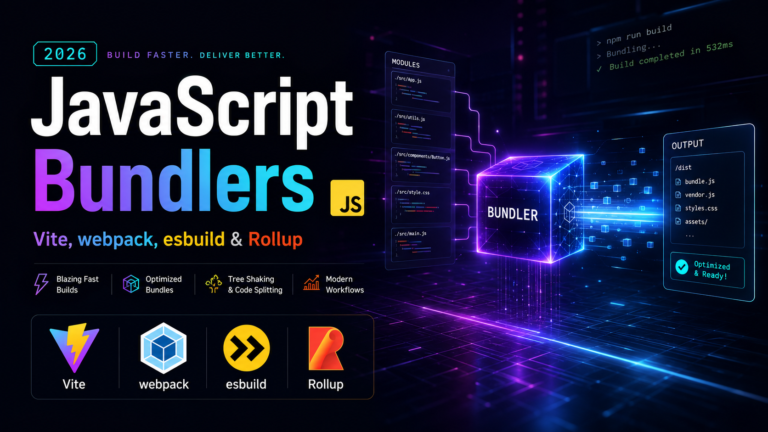
Now that you understand npm and dependency management, you’re ready to explore the tools that transform your JavaScript source code into optimized production bundles. In the next lesson on Bundlers & Build Tools, we’ll cover Vite, webpack, esbuild, and Rollup — and when to use each one.
For more JavaScript fundamentals, check out our lessons on CommonJS require and ES Modules to understand the module systems that npm packages use under the hood.